Friday, November 15, 2013

Oh Shenandoah, I Long to See You.

Hello again!
Boy, I'm just not keeping up with this lately (and my ability to write even remotely effectively has quite  clearly suffered from it). But we'll talk about that another day..

Now that Joey has started the on-crew phase of Prototype, life is a little bananas sometimes. The gist of it: now the work week is seven days long (but still 12+ hours each), and every nine days he switches shifts. So one "week" he works regular day hours, the next noon to midnight, the next all nights, and then another fourth schedule the final week. At the end of this four shift cycle he gets four days off before the cycle starts all over again. It has been a bit of an adjustment, but at least its not forever. 

We had really been wanting to get back to the Shenandoah Valley and visit our alma maters, particularly during that gorgeous fall we've been missing so much. Luckily, Joey snagged just the right crew that allowed us to head up to Virginia two weeks ago for his first four day weekend. So we left Charleston at three in the morning on Friday and spent a too fun weekend back home in Virginia!

Because our time was limited we made our best effort to squeeze in as many visits with friends and walks down memory lane as we could. We first stopped by SVU when we got into town to see old friends and professors, plus a little lunch with our dear friend Mallory and her little Jane. 

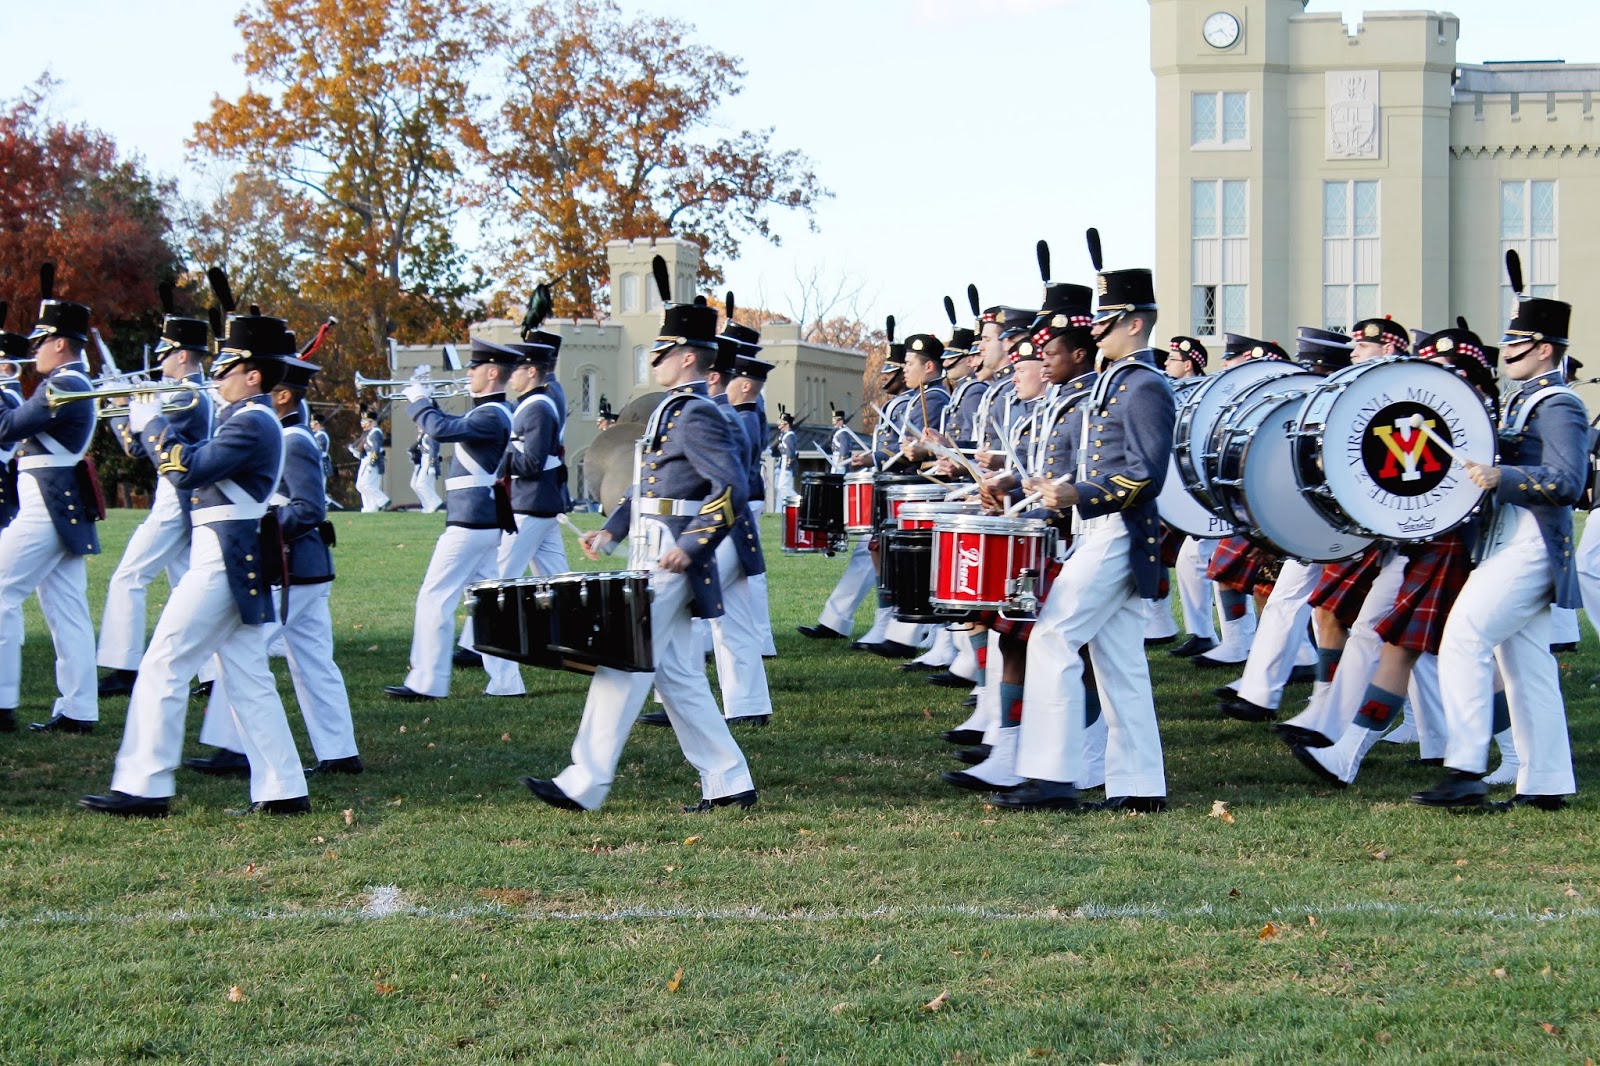
Next stop was VMI for Parade with the Rasmussen family---it was so good to see them all again! 
The kids had fun learning about Parade and some of the VMI traditions.
Following Parade we said goodbye to the Rasmussens and met up with some of Joey's Rats for dinner at one of our old favorites, Macados. We've missed those spicy thai peanut wings!
After sleeping for nearly twelve hours (remember that whole leaving at 3am thing?), we spend Saturday in Lexington window shopping and visiting more of our old haunts. We also got to see the helicopters take off from the VMI parade deck for FTX!
I didn't have many specific requirements for our trip, except for one: we absolutely had to have lunch at the Bistro on Main. Its where I had lunch with my friends the afternoon before Joey and I got engaged and their four cheese lasagna is to die for---I get it every time! And the parmesan artichoke dip is a great way to get that appetite going too. 
And what's a trip to Lexington without Sweet Things?!
Behold, the most amazing waffle cone ever created. All others pale in comparison. Truly. 
After a walking off a little of our honeydew sorbet from Sweet Things, we headed back to Buena Vista to spend some more time with Mallory, Andrew and little miss Jane before meeting up with more friends for dinner, plus a great engagement story from Marty and Amber. Hooray for weddings!
Sunday was our last full day in Virginia. We tagged along with the Brandts for church (during which I put a screaming, wailing Jane to sleep, pretty much making me Wonder Woman) and some afternoon lunch and napping. We just love them!
And the Rasmussens were so kind to invite us for dinner which meant more time playing and yo-yoing with those four adorable peanuts. We loved listening to their stories and seeing how much of a chatterbox Ewan has become!
On our final morning we got together with Brinn Willis to work on a new project (more on that later!) and then visited Mal and Jane one last time--we just can't get enough of our darling "niece" and love being her "Aunty Meggles and Uncle JoJo". 
Joey can attest that I am obsessed with decorative cabbages--so gorgeous!
We took one last walk around SVU before getting on the road again. Boy I miss those gorgeous trees and mountains and weather and…and just all of it!
Oh and the rooster tree! Five years in BV and I could never remember to pull over and snap a picture of the rooster tree. So check that one off the list!

Goodness you guys, I just love Virginia! I maaay have cried intermittently for the first couple hours after we left. We both have so many great memories there---the halloween dance where we first met three years ago, the steps of Main Hall where Joey proposed, the countless nights spent studying together at VMI, the first home we had together after getting married….Lexington/Buena Vista really is our home and where we feel absolutely and completely happy, and we can't wait to go back again.


Monday, October 28, 2013

DIY Virginia Silhouette Wood Table

We are very excited to share this project! It had been on my mental list of future projects for quite some time and it was so fun to finally get it done a couple weeks ago. 
Added bonus: you don't need power tools or a large workspace to make it happen. Just make sure you have some adequate ventilation (open windows, fan, face mask) and you're good to go!

First, lets take a look at the Before:
*Disclaimer: Please, oh please, ignore the lighting in our apartment. I always hate it when people make this apology, but it truly is the worst.*
Joey and I found this metal and glass coffee table last month on clearance. Only problem: I can't stand glass table tops. Smudges are a constant plague (especially with two pets that insist on rubbing their noses on the underside) and the glass is always sliding around. And, I think it just looks plain ugly. But for such a small price tag, we figured we could get the table for the metal frame and just refinish the top. So home with us it went!

We had already collected some pallets a few weeks prior so I figured I could use those for the table top in an effort to make it as cheap a project as possible. Upon researching how to properly prep pallet wood for projects, however, I learned that pallets are potentially one of the worst materials you could use in the home. And being the rational yet germ/chemical-ophobe that I am, I decided I'd be much more confident in the safety of this table if I just bought new, clean wood. 

So if you're skeezed out by potential dangers of using pallets, here's what you do! Go to Lowes or Home Depot or whatever, head over to the lumber section, and pick up these super cheap 1x4x8's (or whatever size will work for your project). They have plenty of knots and distinct grain, giving the same feel as repurposed pallet wood. Plus, they're reasonably priced---I mean, at least I think they are; I'm no lumber expert, so.... Either way, for the four pieces I needed, plus a military discount, I got the wood for less than twelve bucks. Not too bad I'd say! Plus, we were able to have the store cut the wood for us, meaning tool-wise, the rest of the project simply required a hammer and hand saw.
First, Joey set to work measuring and cutting our support boards we used to assemble the table top. And yes, we did the sawing inside---nothing a little (long overdue) vacuuming can't fix!
Next we spaced out the three perpendicular boards, placed just right so the table top "locked" in to the table frame and won't slide around on top, and then took turns hammering all those nails. You'll notice the edges of the wood pieces are not perfectly aligned. Our pieces weren't quite even but hey! That worked for us. It added to the rustic, repurposed feel of the table so we kept it that way.
After sanding, sanding, sanding (which goes mighty fast with two people), my main task was up next: drawing the Virginia silhouette onto the table. And with some carbon tracing paper, it was a cinch! 
I just printed out a giant map of the state and, with the carbon paper placed between the table and the map, traced the outline with a pencil. Easy-peasy.
I spent the rest of the night painting the silhouette with three coats of white paint. And hey! If you got the November issue of Better Homes and Gardens, there's a Lowes coupon for a free sample of the Valspar paint I have here. But even without the coupon (I hadn't gotten it yet), it was only $2.98 for the 8oz jar. And the three coats took next to no paint at all, so I've still got plenty for other projects!

Once the white paint dried and I gave the table a quick wipe down, I set to staining the entire piece with Minwax Provincial stain---$4.77 for 8oz. I forgot to take a photo of this step soooo.......just pretend there's one right here.
After I had completed the painting and staining, the table waited for the weekend so Joey could apply the glossy polyurethane. Meanwhile, Marley napped...and napped some more.
We prepped the table with another wipe down with a clean cloth, and Joey applied two coats of the polyurethane while I watched from the other side of the glass door. What a guy! After that cured, a little super fine sand paper smoothed any tiny bumps from the coating. Then a final wipe down, and it was ready to make its living room debut.
Remy was curious about what I was doing and I just wouldn't get out of the shot. When I firmly told her "Remy, move!", this is what she did----
 Lets take a closer look at that mug, shall we?
 Yup, that's my dog.
 But back to the finished product! 
A repurposed, pallet wood vibe, without the dangers of pallet wood.
We love it and it turned out perfectly! Its so fun to have an idea and watch it come together just how you imagined it. And it doesn't hurt that it was a fairly cheap project and that we pulled it off with no power tools in our yard-less, garage-less state of apartment living. We love having a special piece that reminds us of where we started our life together and built so many special memories. And even though the second person that saw it exclaimed "Its Kentucky!" (Really. Really?) when they looked at it, it has already been a great conversation piece and we're very excited to share it with future guests.

And if you're feeling inspired, here's a list of the materials we used to create our new coffee table:

  • 1x4x8 Appearance grade plus pressure treated lumber (we used four, each cut in half)
  • 3 Thin boards (to run perpendicular to table top)---uhh, sorry, can't remember (or find online) what we used
  • Nails---sorry, not an expert on nails either; we just used about 40 from what we had at home
  • 100 Grit sand paper for smoothing wood
  • 220 Grit sand paper for finishing
  • Valspar 8oz paint sample, White
  • Minwax 8oz interior stain, Provincial
  • Minwax quart fast-drying gloss polyurethane
  • Tape measure
  • Pencil
  • Hammer
  • Hand saw
  • Drop cloth
  • Fabric cloth for staining
  • Rubber gloves for staining
  • Brushes for painting silhouette
  • Brush for polyurethane---and the polyurethane only!

Happy Monday!


Saturday, November 10, 2012

Our Bridal Photo Shoot!

A couple months ago, I mentioned that I did some work for Brinn Willis of BMW Photography and redesigned her blog. Isn't her work great?? We were so pleased with our engagement photos we took with her last fall, and lucky for Joey and me, I was able to trade a new blog design for another photo shoot! So two weeks before we left Virginia (tear tear, sniffle sniffle), Joey and I got all gussied up in our wedding attire again and traipsed through a sun soaked field with our awesome friend, Brinn!


And doesn't Joey look so sharp in his Navy uniform?? I sure do love my officer :)
Related Posts Plugin for WordPress, Blogger...