Saturday, December 24, 2011

Wishing You A Merry Christmas

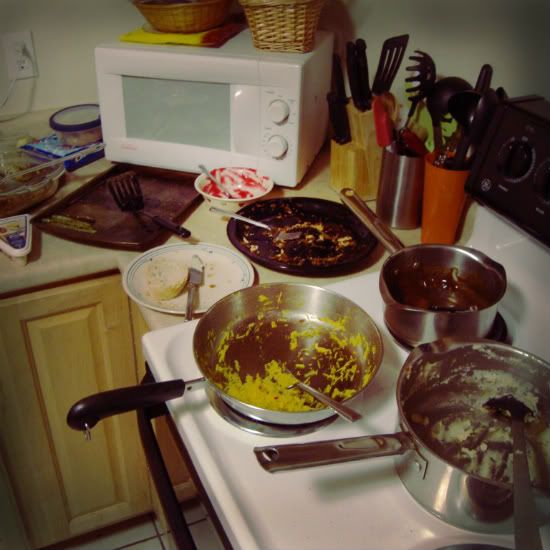
Joey and I did our Christmas dinner celebration on the 11th before we left for holiday break with our separate families. And boy, we cooked up a storm....rosemary turkey, homemade mashed potatoes and gravy, garlic herb spaghetti squash, stuffing, cranberry-orange chutney, bread with garlic cloves, and brie--and the dishes to match!


Wishing you a Merry Christmas!
(and happy Christmas-dinner-dish-washing)

Monday, December 19, 2011

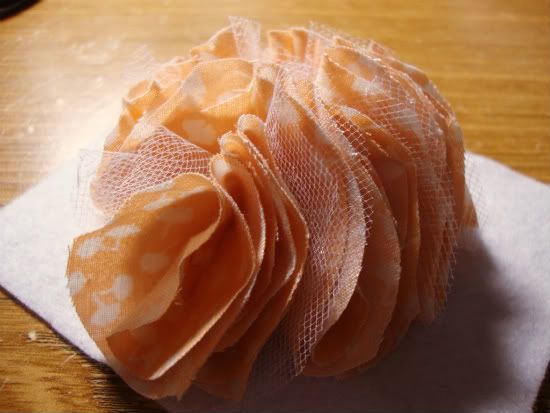
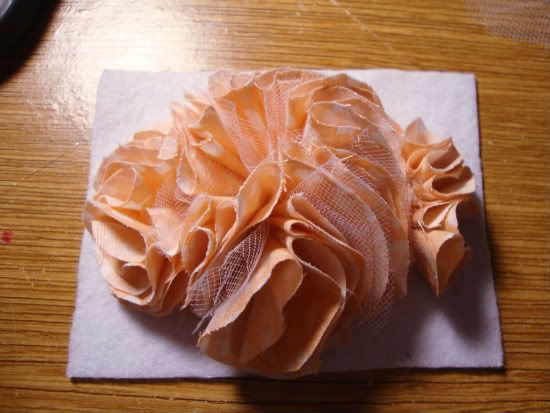
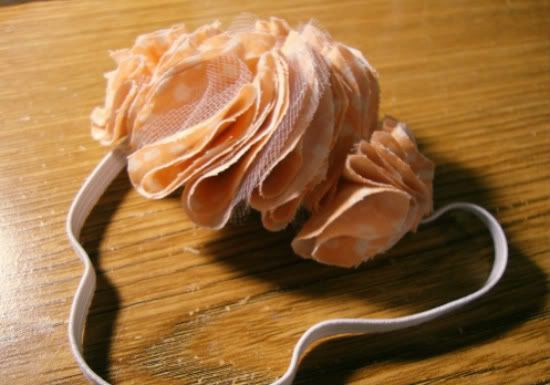
Fabric Hairpiece Tutorial

I got a lot of comments about the green hairpiece I made for our engagement photos last month, and while making a few fabric headbands for a friend, I was inspired to make a tutorial. This is an easy, no sew project--perfect for whipping up before Christmas this week!


The only difference with this tutorial is that the fabric used is cotton, whereas the green fabric was satin. I used a lighter on the edges of the green one to add a little more curl--but be careful! This only works for synthetic fabrics. If you try it on the cotton, it will burn to a crisp in no time!


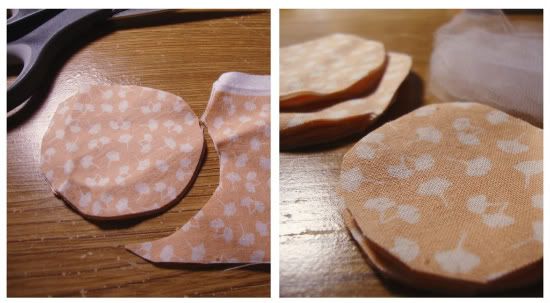
Cut a couple dozen circles from the fabric. Since I wanted a large hairpiece, the green circles were probably three inches in diameter. However, since this peachy headband was for a little one, the circles were about two inches. I also cut some smaller circles and a few white tulle circles to add a little variation. Also, the number of circles needed depends on how full you want your piece. Finally, don't worry about them being perfectly circular.


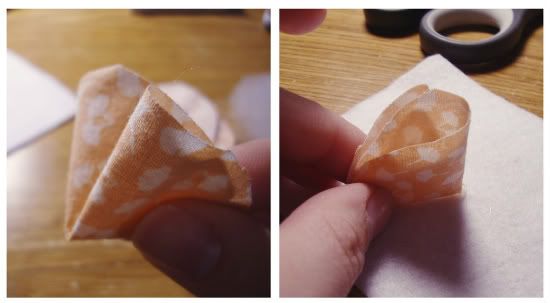
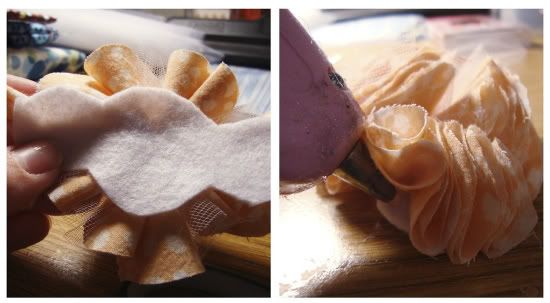
One at a time, fold a circle in quarters. I fold some right-side in and some-right side out; it just depends on the look you want. With your hot glue gun, place a bead of glue on the tip of the fold, and attach to a piece of felt. 


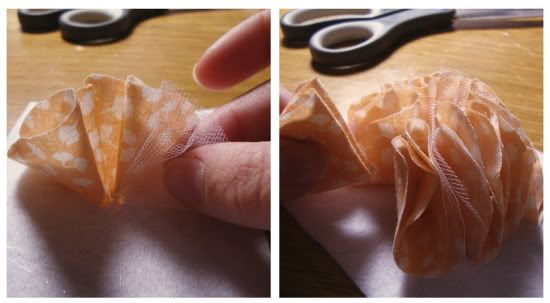
Continue to fold and glue the fabric around in a circle. I added a piece of tulle after every third peach circle.


Fill with folded circles until it reaches a fullness and appearance that you like.


Remember the smaller circles? You can fold and glue them on opposite ends to change the overall shape of the fabric cluster.


Next, turn the felt over and trim to make a base small enough that it won't be seen from the top side of the fabric. You can go back in with the glue gun to attach the edges of the felt to the fabric to make it a little more secure and firm.


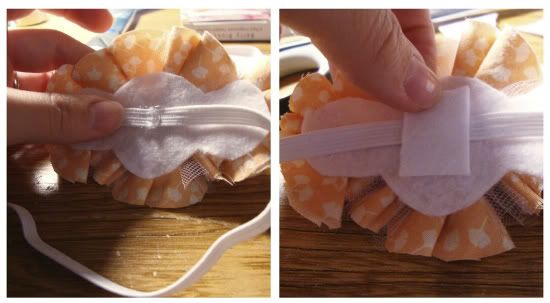
Take a piece of elastic cut to fit around the head snuggly, and glue each end to the center of the felt. Make sure to double check which way you want the piece to sit on the head and glue the elastic accordingly. You can also use hard headbands, pre-made stretch headbands, or clips--again, since this was for a little girl, I used a piece of elastic instead to make sure it was small enough to stay on her little head. Next, cover the "seam" by gluing a small square of felt to the back.


And there you are--a fun hairpiece for a little one, a dear friend, or yourself!

Sunday, December 18, 2011

Spiced & Iced Gingerbread Men Recipe

Just in time for Christmas baking!

For those of you who like your gingerbread men to pack a bit of a punch, this recipe is for you! The dough has a little more spice which makes for wonderfully delightful and flavorful Christmas cookies. And perhaps I never knew to make icing this way, but I used an icing recipe that's made with a meringue base, so it hardens up enough that it won't get smudged (my constant struggle with icing cookies) but it doesn't turn into plaster either. I made two batches last sunday for visiting teachees and Joey and his roommates, and they were all gone within just a day or two!


Spiced and Iced Gingerbread Men
Cookie recipe adapted from Allrecipes

  • 1/2 cup butter
  • 1/2 cup sugar
  • 1/2 cup molasses
  • 1 egg yolk
  • 2 cups sifted all-purpose flour
  • 1/2 teaspoon salt
  • 1/2 teaspoon baking powder
  • 1/2 teaspoon baking soda
  • 1/2 teaspoon ground cinnamon
  • 1 teaspoon ground cloves
  • 1 teaspoon ginger
  • 1/2 teaspoon ground nutmeg
  • 2 large egg whites or 5 tablespoons meringue powder
  • 2 teaspoons fresh lemon juice or 1 teaspoon vanilla extract
  • 3 cups confectioners' sugar, sifted
  1. In a large bowl, cream together the butter and sugar until smooth. Stir in molasses and egg yolk. Combine the flour, salt, baking powder, baking soda, cinnamon, cloves, ginger, and nutmeg; blend into the molasses mixture until smooth. If your dough is too sticky, slowly add a little more flour until it reaches a texture you like. Cover, and chill for at least one hour.
  2. Preheat the oven to 350 degrees F (175 degrees C). On a lightly floured surface, roll the dough out to 1/4 inch thickness. Cut into desired shapes with cookie cutters. Place cookies 2 inches apart on ungreased cookie sheets.
  3. Bake for 7-10 minutes in the preheated oven, until firm. I recommend watching the first batch very carefully to know how long they need to bake for--my oven gets a little warmer and I like softer gingerbread, so I only cooked them for 6 minutes. Remove from cookie sheets to cool on wire racks. 
  4. For icing the cookies: With a hand mixer, beat the egg whites with the lemon juice or extract until frothy. Add the sifted powdered sugar and beat on low speed until combined, smooth, and shiny. Turn to high and beat approximately 5 minutes till stiff and glossy. Add food coloring, if desired, and transfer to a pastry bag to pipe onto cookies.
Enjoy--and get ready to ruin your diet!

Wednesday, December 14, 2011

Design: Lace Brushes for Photoshop


Well friends, here is a link to a handful of lace brushes for photoshop from Katrina of Pugly Pixel! She also has helpful tips and links to other tutorials and downloads.

Once the brushes are downloaded, just click to open the file. Next, go into photoshop, select the brush tool. Open the tab 'brushes' to see all of your brushes, including your darling lace brushes.

 Enjoy!

Tuesday, December 13, 2011

Military Tribute by Oh Penelope Photography

I've noticed that since I started dating Joey and we began to talk seriously about marriage, things that I would've found a little cheesy before, now melt my heart and often touch me very deeply. This is especially true with military things. Yes, Joey may never be deployed to a combat zone, but he will still be away serving his country. I'm very grateful for him and proud of him.

I came across this blog post from Oh Penelope Photography by photographer Caitlin Trantham this afternoon, and it just touched my heart in ways I don't think it would have prior to being with Joey.

During this holiday season when we are surrounded by all that we've been blessed with, let's not forget those who have sacrificed for us, and their families who are left behind.


Sunday, December 11, 2011

Pining for Italy

Spello, Italy

Can I please have back the peace, calmness, and rejuvenation I had in quiet, little Spello in May?

Thursday, December 8, 2011

Salted Brown Butter Rice Crispy Treat Recipe

Well I've had several friends ask me to post this recipe, and after making a pan of them for Joey this afternoon, I was inspired to share it.
The name might sound weird--salt in a rice crispy treat? brown butter??


But oh. It is so good.

Its just a couple minor things, but browning the butter and adding salt makes all the difference in the world. Just try to eat a normal rice crispy treat after having these--it'll never be the same. These are just too delicious!


Recipe and image from Smitten Kitchen

Salted Brown Butter Rice Crispy Treats


Makes 16 2-inch squares or 32 1- x 2-inch small bars

4 ounces (1/4 pound or 1 stick) unsalted butter, plus extra for the pan
1 10-ounce bag marshmallows
Heaping 1/4 teaspoon coarse sea salt
6 cups Rice Krispies cereal (about half a 12-ounce box)

  • Butter (or coat with non-stick spray) an 8-inch square cake pan with 2-inch sides.
  • In a large pot, melt butter over medium-low heat. It will melt, then foam, then turn clear golden and finally start to turn brown and smell nutty. Stir frequently, scraping up any bits from the bottom as you do. Don’t take your eyes off the pot as while you may be impatient for it to start browning, the period between the time the butter begins to take on color and the point where it burns is often less than a minute.
  • As soon as the butter takes on a nutty color, turn the heat off and stir in the marshmallows. The residual heat from the melted butter should be enough to melt them, but if it is not, turn it back on low until the marshmallows are smooth.
  • Remove the pot from the stove and stir in the salt and cereal together. Quickly spread into prepared pan. I liked to use a piece of waxed or parchment paper that I’ve sprayed with oil to press it firmly and evenly into the edges and corners, though a silicon spatula works almost as well.
  • Let cool, cut into squares and get ready to make new friends.

Tuesday, December 6, 2011

Japanese Curry Recipe


About three years ago I went with my friend Katie to Washington DC to visit the temple, and while we were there we stayed with her parents. Her dad (who coincidentally taught at Power School in Charleston SC, where Joey and I are headed next year!) served his mission in Japan and made us Japanese curry for dinner. Oh boy was it delicious!
Fast forward a couple years and I'm at the commissary, and I spot the curry mix Katie's dad had used...I wasn't sure what I was going to do with it, but I knew I had to buy it! I started to remember what Katie's dad had put in his curry, added a couple extras, and now--Joey and I have a favorite meal. The great thing about this recipe is that you can toss in any veggies you like and forget the ones you don't. A couple chicken breasts and potatoes and a handful of each diced veggie stretches so far in this recipe too. Whats better is, you can stretch the curry sauce even further by adding some more water (maybe up to a 1 1/2 cups more), so you can feed an extra guest or two!

So, here's the recipe:

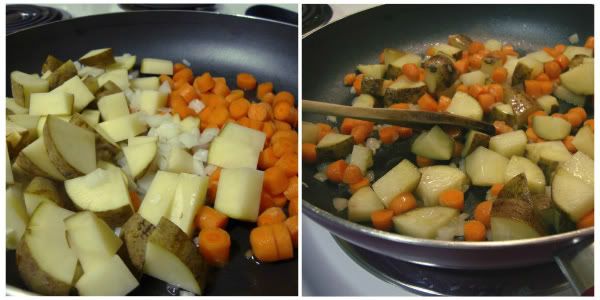
Dice potatoes, onions, and carrots and cook in a tbsp or two of oil. I don't have an exact amount of veggies, Joey and I just cook what we need at the time. The great thing about this is that a couple potatoes and carrots and half an onion will stretch very far!

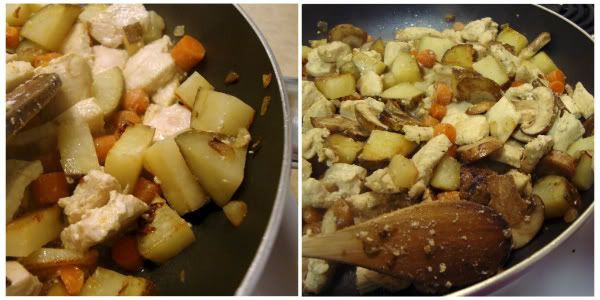
Once the carrots and potatoes begin to soften, add thawed chicken breasts cut into bight size pieces. Cook until its barely done, then add sliced mushrooms.

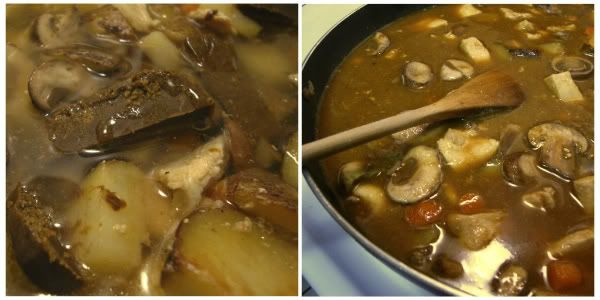
Add 2 1/2 cups of water and the curry mix blocks. Yes, it'll look a little weird. Dissolve the mix into the water, and bring the sauce to a boil. Reduce the heat, simmer, and cover.

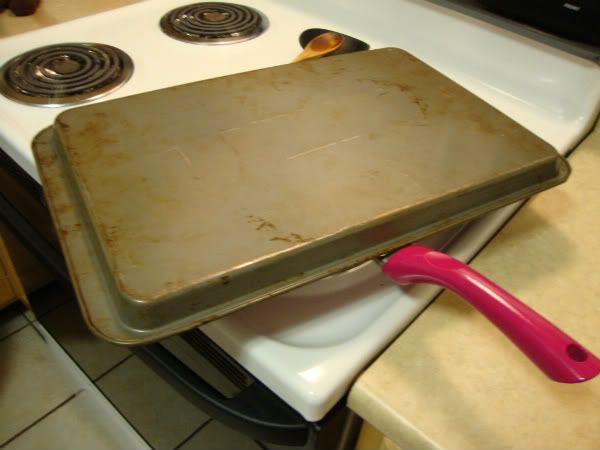
What we do with a baking sheet when we don't have any lids that fit our pans.
Let the sauce thicken to a consistency you like. This is when we normally add a couple handfuls of frozen peas but we forgot them this time.


Serve curry over a pile of rice, drizzle some Sriracha (the curry mix comes in mild or hot but we like a little more kick), and top with sliced green onion.

                                                                             ENJOY!  

Thursday, December 1, 2011

A Face Lift for the Blog

Well friends, I have been wanting to give my blog the works for a few weeks now, but wasn't too sure what to do with it.
I joked with Joey that I wished I could just make it about us, since it has transformed from posts on things I like, to now my life--and more importantly, my life with him. I thought people might think its weird if I re-did the blog this way since we aren't married yet---but you know what?
Who cares?! If the blog is about my life, and he's the biggest part of my life, then why not just do it? I already share our adventures and interests and projects, so I might as well go for the blogging gold.


In other news, wedding planning is starting to pick up, which is simply fantastic. For the past five months all I've been able to do is plan and paste inspiration photos into my Moleskine book, but now I actually get to do things! I have designed (and redesigned, and redesigned some more) our announcements and sent them to the printer today, I've bought some fabric for a few fun DIY projects, we bought our wedding bands last weekend, and we finally scheduled our date with the temple (we had to wait because the marriage license application only lasts six months). The best part of being able to actually do stuff now? The time goes by so much faster.

Watercolors


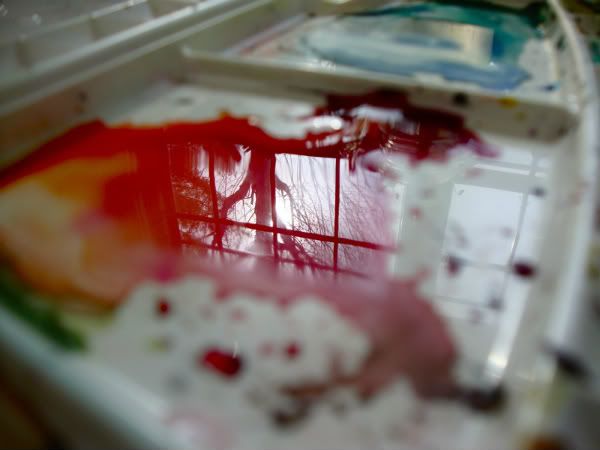
Why can't watercolor painting be as fun and beautiful as mixing the paint?

errmmmm, I'm pretty glad that my watercolor class ends next week...
does that make me a bad art major?
Related Posts Plugin for WordPress, Blogger...